
Are you relatively new to iPads in the classroom? Are you looking for some tips to help you navigate the new iOS 7? Today we take a look at 10 Features Every iPad Owner Should Know, so that you have the knowledge and confidence you need to shine in front of your students.
This post is a collaborative piece that was created with the help of Jonathan Wylie, a talented Instructional Technology Consultant from Iowa, USA. Please take time to check out his blog at http://jonathanwylie.com. Find Jonathan on Twitter as @jonathanwylie.
1. How to Multitask and Kill Apps that Misbehave!
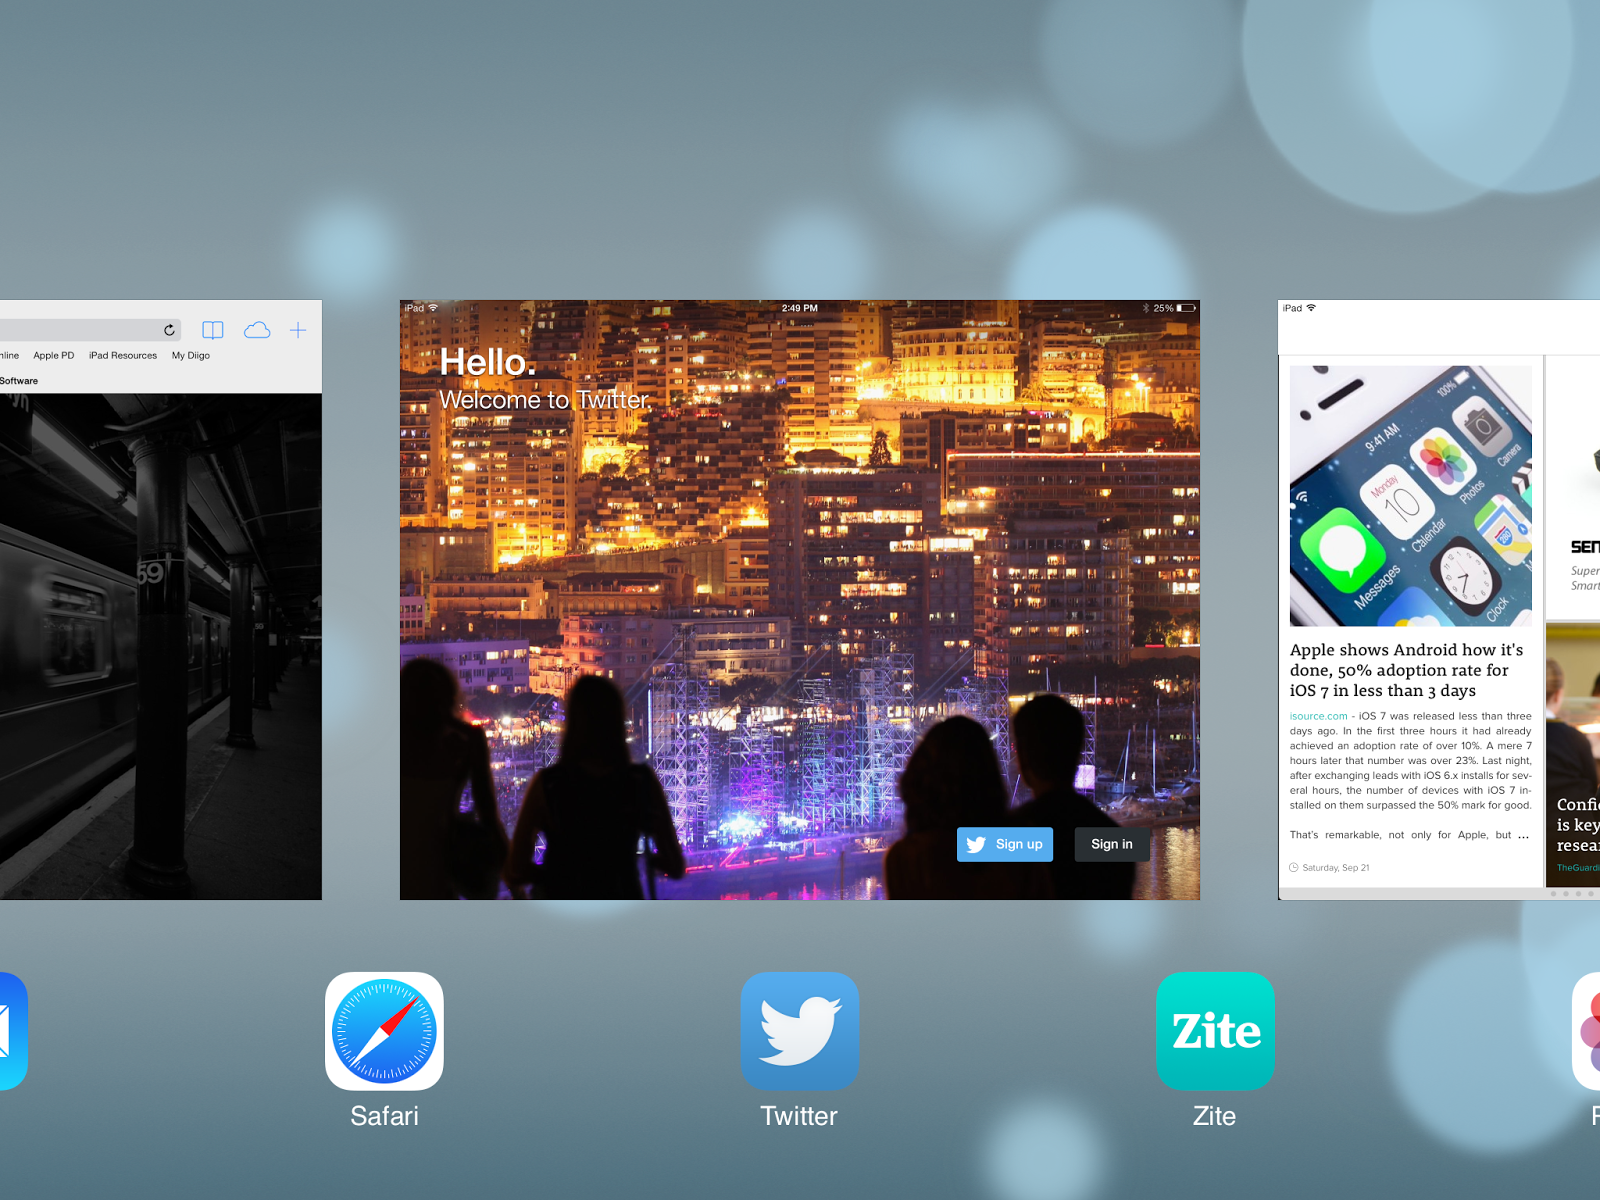
In iOS 7, multitasking is easier and more powerful than ever. To start, simply double tap the home button, or place four fingers on the screen and push up. This will reveal Apple’s slick, new multitasking menu. To switch to a new app, simply scroll sideways until you see the one you want. Then tap on the app to go straight to it.
You can also close apps from the multitasking menu. To kill an app that is misbehaving, scroll sideways through the apps until you find the errant app, and swipe upwards with one finger. If you are feeling dextrous, try swiping two or even three apps at once!
2. How to take Screenshots on iPad or iPhone
Screenshots are incredibly useful for educators wishing to share their iPad screens. We have used this great feature multiple times on this post. You can take a screenshot of ANYTHING that is on your iPad: a website, app, existing photo, etc. Taking a screenshot (a still image of the screen) is quite easy and only takes a few seconds to learn. iOS devices only have two physical buttons: the sleep/wake and home buttons. Press and hold both at the same time and you will see your device “blink” and, if it’s not on silent mode, also make a camera clicking sound. Your new “photo” will now be placed in your Camera Roll, where you can send or share it in multiple ways to your students/parents/colleagues etc. Check out some uses of screenshots in education in this post.
3. How to Enable Speak Selection
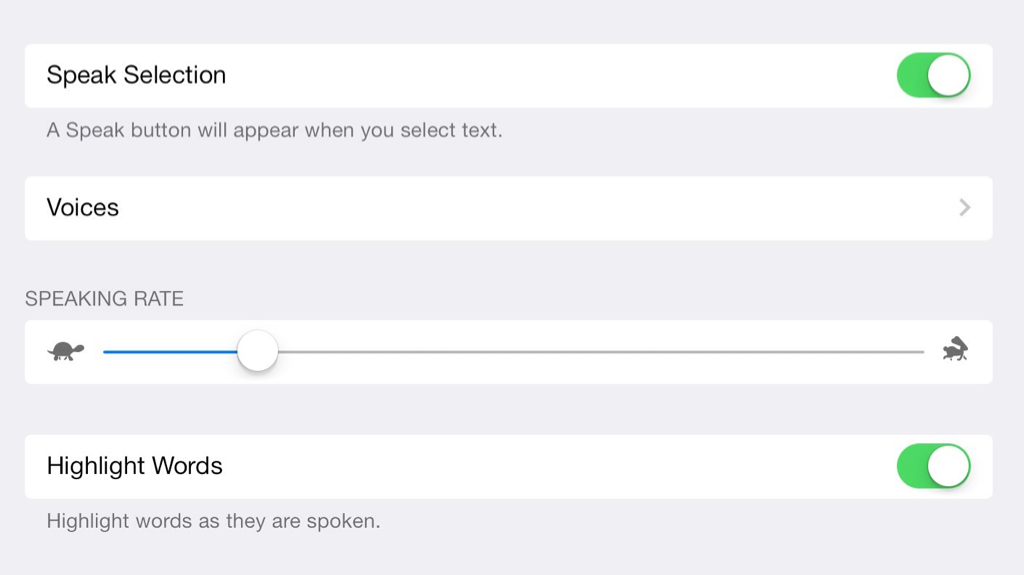
Did you know your iPad can read text aloud for you? This can be a great support for struggling readers or teachers that work in a special education classroom. To turn on Speak Selection, go to Settings > General > Accessibility > Speak Selection and flip the switch to turn it green. Next, adjust the speaking rate to your preferred speed, and choose whether you want the iPad to highlight words while it reads them, (usually the best choice for teachers).
To make the iPad read text aloud, you have to select the text you want it to read. This could be in Safari, Notes, iBooks or a number of other apps. Select text by pressing and holding on the first word you want read. Once you see the magnifying glass, let go. Pull the blue bars on either side of the word to select the amount of text you want read, then tap Speak in the black pop-up menu above your selected text.
4. How to Lock the iPad on One App
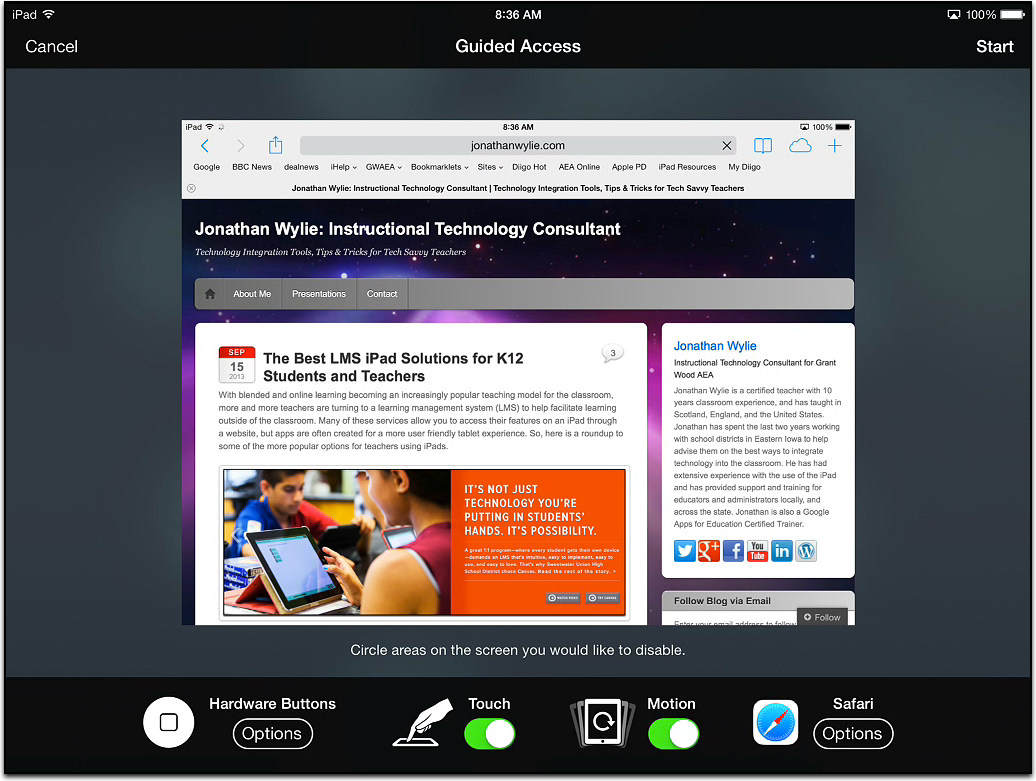
Guided Access is great for younger students, special education classrooms, or even when using the iPad at home with your own kids! It locks students on an app of your choice, and will not let them out of it. Turn it on by going to Settings > General > Accessibility > Guided Access and flipping the switch to turn it green. Next, choose a passcode, and remember it!
To initiate Guided Access, open the app you want and triple click your home button. Check the settings along the bottom of your screen are the ones you want, then tap Start in the top right hand corner. If students press the home button, the power button, or swipe with multitasking gestures, none of those actions will have any effect.
To exit Guided Access, triple click the home button and enter the passcode you set earlier. Then tap End in the top left hand corner of the screen. Forgot the passcode? Press and hold the power and the home button at the same time, and keep them held down until your screen goes black and the Apple logo appears. This restarts your iPad and kicks you out of Guided Access. Just don’t tell your students!
How to Automatically Download App Updates
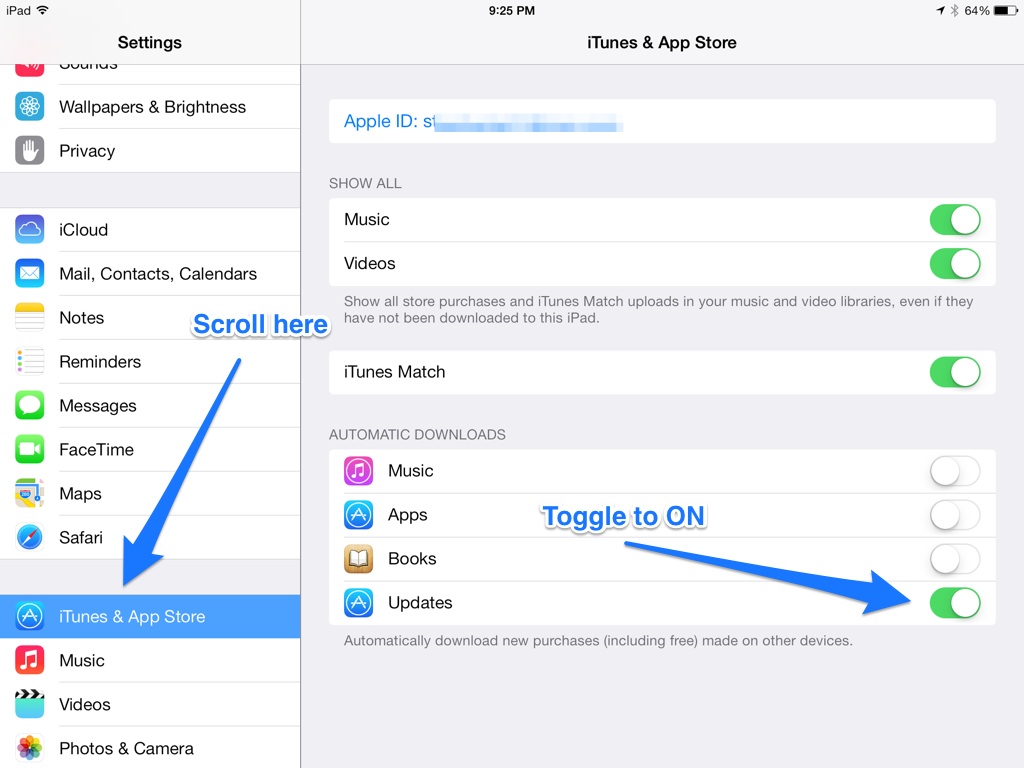
An important new feature that will impress most users is Automatic Downloads. With this setting on, people will always have the latest updates for all their apps. I myself (Steve) would rather update them one at a time, in case a good feature is removed, and so I can see exactly what the new features are. However, most people will probably prefer the convenience of having all their apps updated at all times.
Go to Settings > iTunes & App Store then find Updates in Automatic Downloads. Toggle it to ON (The green will show)
How to Search on Your iPad
In iOS 7, searching your iPad has never been easier. So, the next time you lose an app, simply swipe downwards with one finger on any of the home screens on your iPad. This reveals a search bar at the top of your screen. Type in the name of the app you are looking for and tap Search on the keyboard.
Want to look for more than just apps? Go to Settings > General > Spotlight Search, and put check marks next to the items you want to appear in a search. You can search Mail, Notes, Reminders and more.

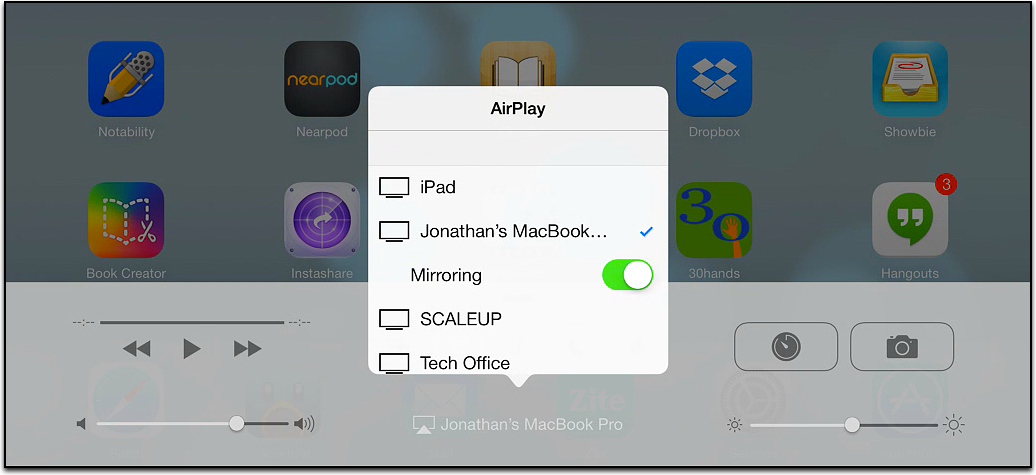
How to AirPlay
Got an Apple TV in the classroom? Are you running Reflector or AirServer on your Mac or PC? If so, you can wirelessly project your iPad to an LCD projector or HDTV. Just make sure that your iPad and the AirPlay device (Apple TV or your computer) are on the same Wi-Fi network.
Next, swipe up from the bezel on the bottom edge of your iPad to reveal the new Control Centre. Tap AirPlay, and choose the device you want to AirPlay to (either your Apple TV or your computer). Then, turn on Mirroring to send your iPad to the big screen!
For more help setting up AirPlay on your iPad or Mac, please read An Educator’s Guide to AirPlay in the Classroom.
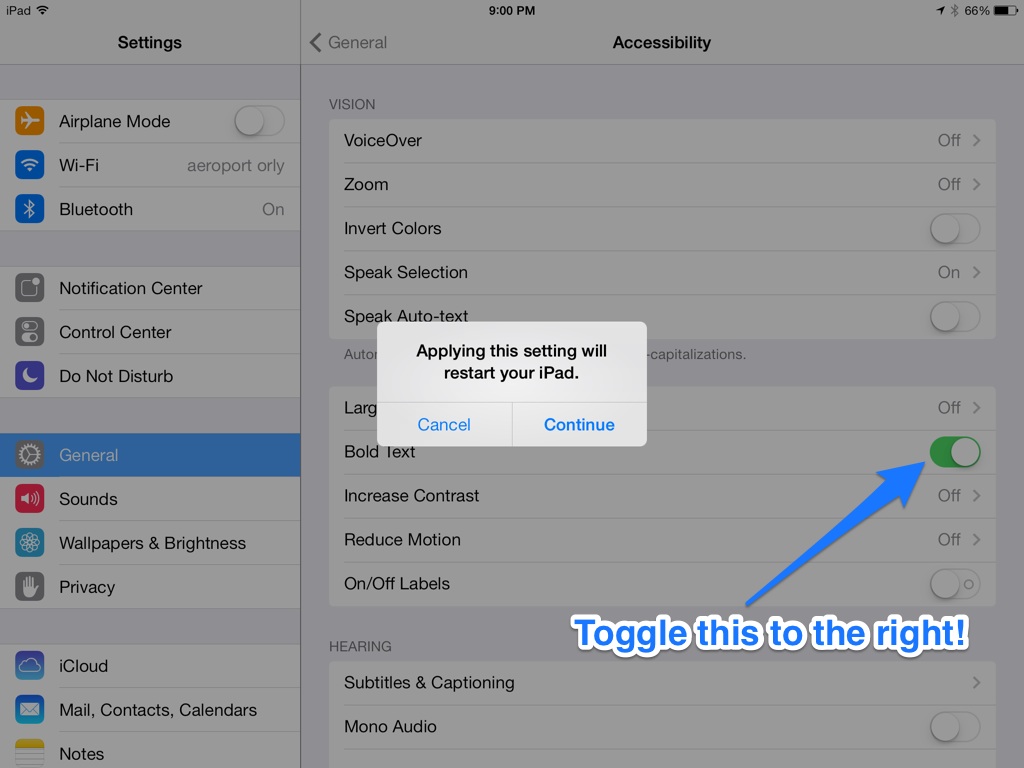
How to make the text in iOS 7 more readable
The new font in iOS 7 is very thin. It has been a common complaint from people, who say that they are having trouble reading the new Helvetica Neue Ultra Light font. There is a way to make the entire text on your menu screens a little easier to read.
To enable this, go to Settings > General > Accessibility and then switch to “Bold text”. You will get a warning: “Applying this setting will restart your iPad/iPhone”. No worries there: restarting will only takes a few seconds. Your text will now appear much more readable.
Below: The left screen is the default slimmer font. The right is the bolder version.

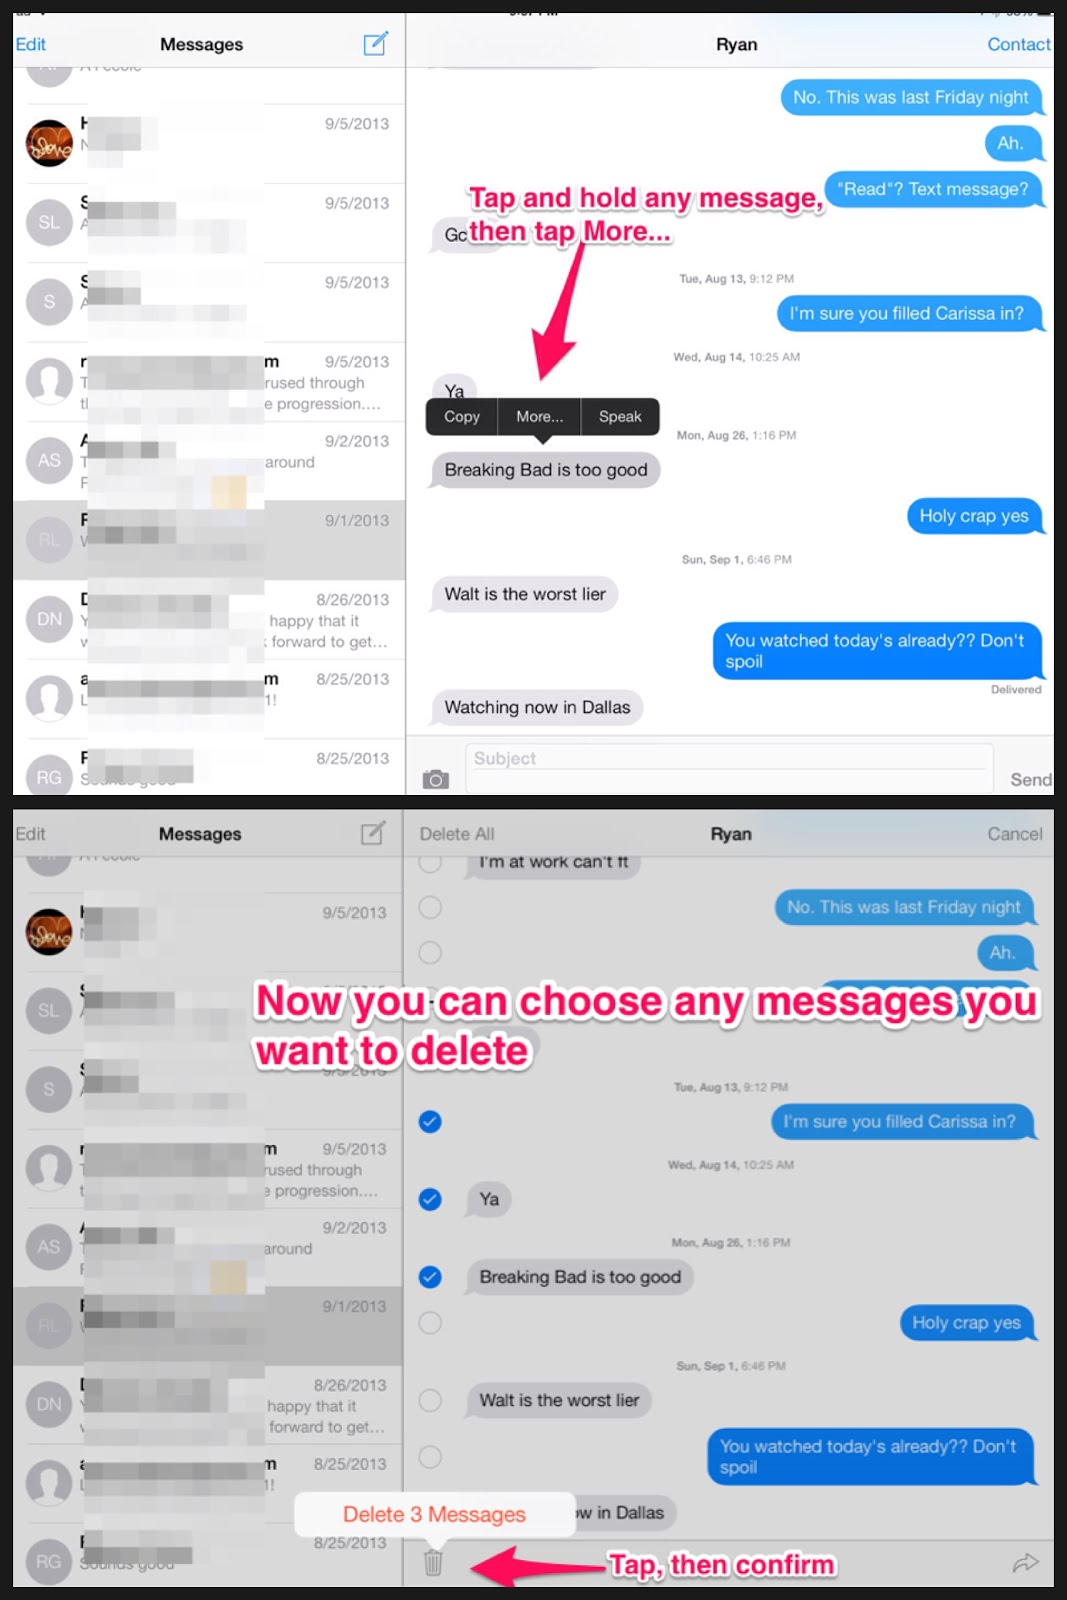
How to delete individual iMessages & Texts in the Messages app
Sometimes, you want to delete certain messages within a conversation in the Messages app (as opposed to deleting entire conversation threads). In iOS 6, there was an edit button, which allowed you to choose messages to delete. The delete feature is now hidden, but fortunately not gone. Tap and hold any message in the thread, then choose “More…” You will be able to choose multiple messages to delete (or forward). You will be prompted with a confirmation. Hopefully obvious, but this does not delete the delivery of the message (the recipient will still get it). You are just deleting it in the thread, so that anyone with your device won’t be able to see it in the future.
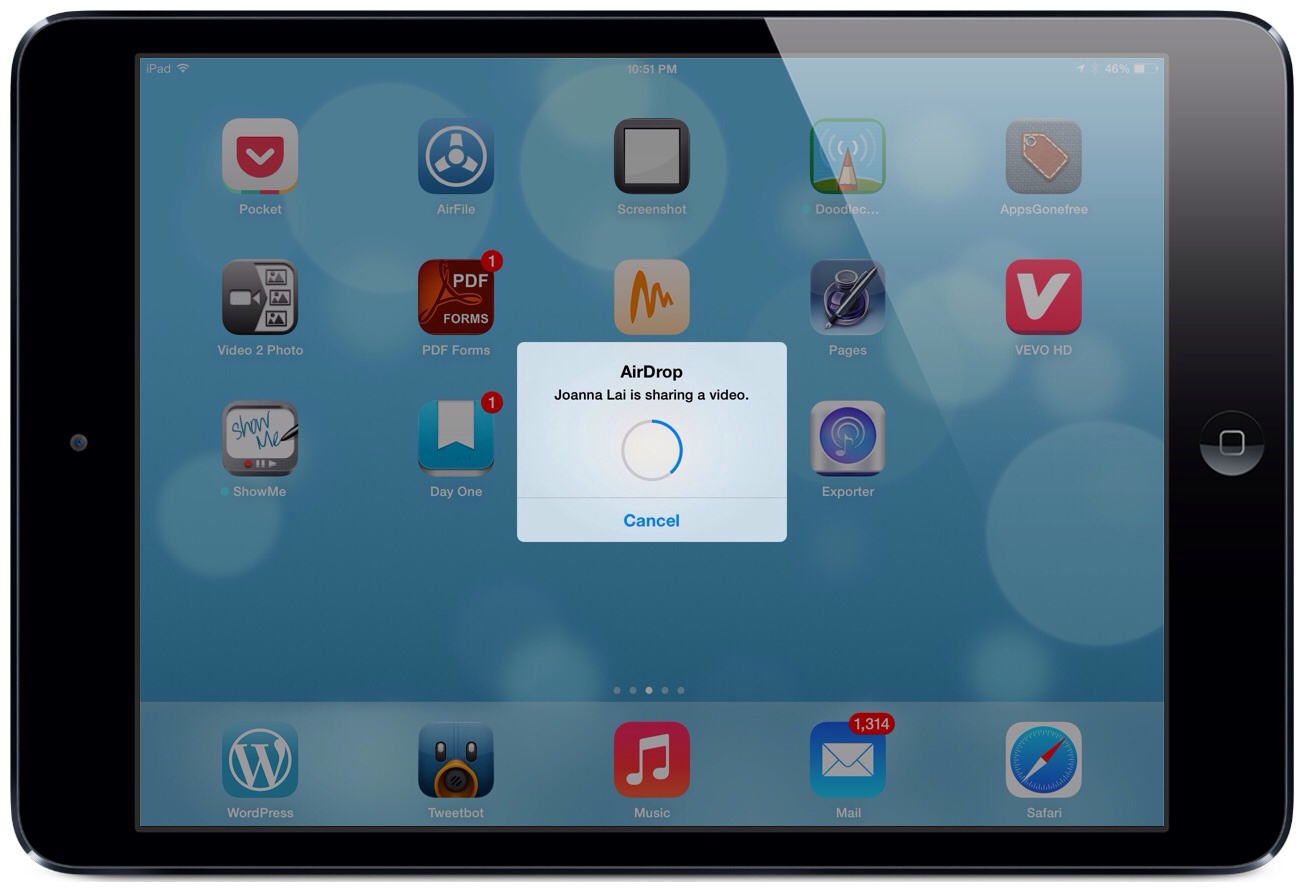
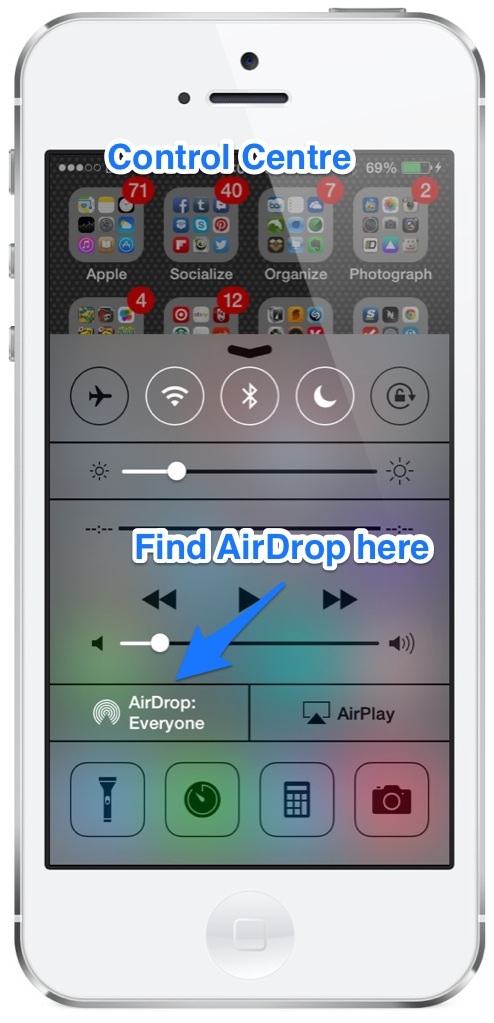
How to use AirDrop
AirDrop is a brand new file transfer system within iOS 7. It is a seamless and very quick way to transfer files via Bluetooth and Wi-Fi connections between “nearby” devices.
To send a file via AirDrop, both devices must have iOS 7, and have both Wi-Fi and Bluetooth turned on. If the sender info is not within the recipient’s contact list, “Everyone” has to be selected. This just requires a simple tap from the new Control Center. As soon as a file is successfully shared, it will open, and also be imported into the recipient’s Camera Roll. Make sure both sender and recipient have AirDrop turned on. Students can then “find” the teacher iPad and choose anything within the Camera Roll to send him/her.
In my initial testing of AirDrop, photos were shared instantly, while videos just took a few seconds, depending on their length. This will become a much better way to transfer iOS files from one device to another, and again takes away the need to email the files or upload to a cloud-based solution like Dropbox.
I look forward to collaborating with Jonathan again in the near future. I hope you were able to learn a few new things with this post. iOS 7 does bring along with it many new and exciting features that make iPads even more efficient to use.
Did you like this post? Do you have colleagues who could use these tips? Share this post and our blogs with them!
Steve: teachingwithipad.org
Jonathan: jonathanwylie.com
Further reading:
- My First Impressions of iOS 7
- The Habits and Philosophy of an Effective iPad Teacher [infographic]
- How to be a Terrible iPad Teacher
Do you have any secret tips that you want to share with us? Please let us know in the comments!


Cannot find Airdrop and both WiFi and Bluetooth are on??
What devices are they? They actually have to be recent devices. iPhone 5 or later, iPad 4 and 5th gen iPod touch are compatible.